
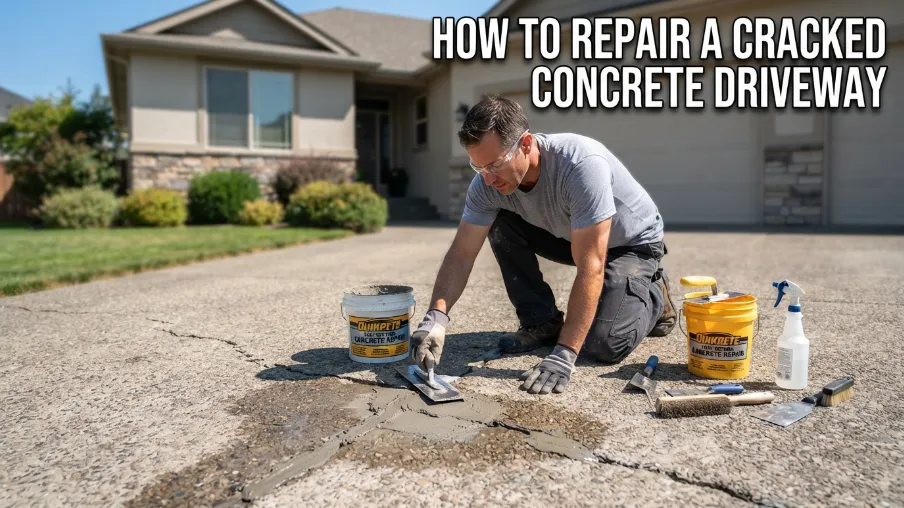
You pull into your driveway every single day, so it’s easy to stop noticing the cracks until one day you actually look down and realize how bad they’ve gotten. What started as a thin hairline crack has turned into something wider, with bits of concrete crumbling at the edges and weeds poking through in places.
The good news is that most driveway cracks are fixable without hiring anyone or spending a fortune. This guide walks you through exactly how to repair a cracked concrete driveway yourself, step by step, in simple terms.
Let’s get into it.
Why Concrete Driveways Crack in the First Place
Before jumping into repairs, it helps to understand why this happens so often. Concrete naturally expands and contracts with temperature changes, and over years, this constant movement causes small cracks to form. Water that seeps into these cracks and freezes during colder months makes them wider over time.
Heavy vehicles, tree roots growing underneath, poor soil compaction before the driveway was poured, and general age all add up too. Knowing the cause matters because if the underlying issue isn’t addressed, like a tree root still growing, the crack can come right back even after you repair it.
How to Tell If a Crack Is Simple or Serious
Not every crack needs the same fix. Some are cosmetic and easy to patch, while others point to bigger structural problems underneath.
Hairline cracks that are thin and don’t move when you press on either side are usually just surface level and simple to repair. Cracks wider than half an inch, or ones where one side sits higher than the other, often mean there’s shifting happening below the surface. If you notice multiple large cracks spreading in different directions, or sections of your driveway sinking, that’s a sign you might need a professional to look at the base and soil underneath rather than just patching the surface.
For this guide, we’ll focus on the common surface and moderate cracks that most homeowners deal with, since these make up the majority of driveway damage.
Tools and Materials You’ll Need
- Wire brush
- Chisel or crack chaser tool
- Shop vacuum or leaf blower
- Concrete crack filler or patching compound
- Caulking gun (for tube style fillers)
- Trowel or putty knife
- Concrete bonding agent
- Sand (for larger cracks, if using sand mix method)
- Concrete sealer
- Safety gloves and eye protection
Step 1: Clean Out the Crack Completely
This is the step people rush through the most, and it’s the one that determines whether your repair actually lasts. Any loose debris, dirt, or old crumbling concrete left inside the crack will stop the new filler from bonding properly.
Use a wire brush to scrub out the inside of the crack, removing loose bits and dust. For wider cracks, a chisel or crack chaser tool helps widen and clean the edges slightly, which actually helps the filler grip better. Once you’ve brushed it out, use a shop vacuum or leaf blower to remove all the remaining dust and small particles.
Step 2: Remove Weeds and Growth
If you’ve got weeds or grass growing through the cracks, pull them out completely, roots included if possible. Leaving roots behind means they’ll keep pushing through your repair and crack it open again within months.
For stubborn growth, a bit of vinegar or a weed killer applied a few days before you start repairs can help kill off the roots so they don’t come back through your patch job.
Step 3: Rinse and Let It Dry
Once the crack is cleaned out and free of debris, rinse it with water to remove any remaining dust, then let it dry completely before applying any filler. Depending on weather, this usually takes a few hours to a full day.
Applying filler to a damp crack causes poor bonding and can lead to your repair failing much sooner than it should.
Step 4: Choose the Right Filler for the Crack Size
Different crack sizes call for different products, so picking the right one matters.
For hairline cracks, a liquid concrete crack filler works well since it flows into thin gaps easily. For medium cracks, around a quarter inch wide, a caulk style crack filler applied with a caulking gun gives good coverage and flexibility. For wider cracks, a sand mix or vinyl concrete patching compound gives you more bulk and strength to fill the gap properly.
Check the product label since most will specify the crack width range they work best for.
Step 5: Apply a Bonding Agent
For patching compounds, especially on larger cracks, brushing on a concrete bonding agent before applying the patch helps the new material stick to the old concrete much better. This step is often skipped, but it makes a real difference in how long your repair holds up.
Let the bonding agent become tacky, usually just a few minutes, before applying your patching material on top.
Step 6: Fill the Crack
Apply your chosen filler into the crack, working it in firmly with a trowel or putty knife so there are no air pockets underneath. Slightly overfill the crack so the material sits a little above the surrounding surface, since it will settle as it cures.
For caulk style fillers, run a steady bead along the crack and smooth it out using the tip of the tube or a putty knife dipped in water.
Step 7: Smooth and Level the Surface
Once the crack is filled, use your trowel to smooth the surface so it blends in as closely as possible with the surrounding concrete. Wipe away any excess material around the edges before it fully sets, since dried excess is much harder to clean up later.
If you want the patch to blend in visually, some people lightly dust the wet filler with dry cement powder to match the surrounding color, though this step is optional.
Step 8: Let It Cure Fully
Curing time depends on the product you used, but most fillers need at least 24 hours before you can walk on them, and closer to 48 to 72 hours before driving a car over the repaired area.
Avoid rushing this step. Driving over a crack repair before it’s fully cured is one of the most common reasons patches fail early.
Step 9: Seal the Entire Driveway
Once your crack repairs have cured, it’s worth applying a concrete sealer over your whole driveway, not just the patched areas. Sealing helps protect against water penetration, which is the main reason cracks form and widen in the first place.
Apply the sealer with a roller in thin, even coats, and let it dry fully before driving on it again. Doing this every couple of years significantly extends the life of your driveway and reduces how often you’ll need to repeat this whole process.
When It’s Time to Call a Professional
If you’re dealing with large sections of sinking concrete, multiple deep structural cracks, or a driveway that’s shifted noticeably in certain spots, patching alone won’t solve the underlying issue. In these cases, it’s worth getting a professional assessment, since the problem might be related to the soil base or drainage underneath rather than just the surface.
Trying to patch over a structural issue usually just delays the inevitable and costs you more money in the long run.
Common Mistakes to Avoid
- Skipping the cleaning step. Debris left in the crack stops the filler from bonding properly.
- Ignoring weeds and roots. They’ll keep pushing through your repair if not fully removed.
- Using the wrong filler for the crack size. A thin liquid filler won’t hold up in a wide, deep crack.
- Rushing the curing time. Driving over a fresh patch too soon almost always causes it to crack again.
- Never sealing the driveway afterward. Skipping this step means water keeps getting in and causing new cracks over time.
- Final Thoughts
Repairing a cracked concrete driveway isn’t as complicated as it might seem once you understand the actual steps involved. The real key to a lasting repair is proper prep work, cleaning the crack thoroughly, removing any growth, and using the right filler for the job. Rushing through these steps is what usually causes people to end up patching the same crack again a year later.
Take your time with each step, let everything cure properly, and finish with a good sealer, and your driveway repair should hold up well for years to come.
Frequently Asked Questions
1. How long does a concrete crack repair last? A properly done repair, with good prep and sealing, can last anywhere from 5 to 10 years depending on weather conditions and how much traffic the driveway gets.
2. Can I repair a driveway crack in cold weather? Most fillers need temperatures above a certain point, usually around 40 degrees Fahrenheit, to cure properly. Repairing during very cold or freezing weather often leads to poor results.
3. Is it cheaper to repair cracks or replace the whole driveway? Repairing is almost always cheaper if the damage is limited to surface cracks. Full replacement is usually only needed for major structural issues affecting large sections of the driveway.
4. How often should I seal my driveway to prevent new cracks? Sealing every 2 to 3 years is a good general guideline, though it can vary based on your climate and how much sun and rain the driveway gets exposed to.