
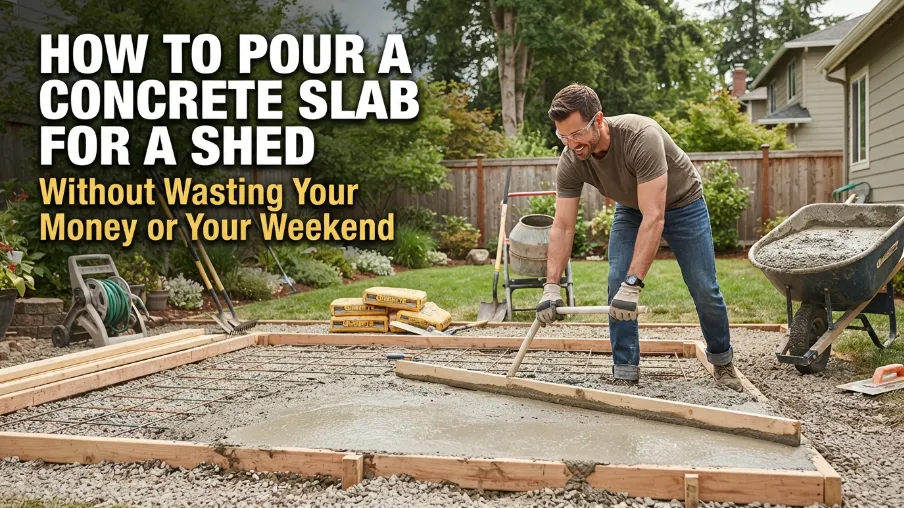
Pouring a concrete slab looks simple on YouTube. Someone mixes some concrete, pours it into a wooden frame, smooths it out, and boom, perfect slab. Then people try it themselves and realize how many small details actually matter. The frame isn’t level, the concrete sets too fast, cracks show up a few weeks later, or the slab ends up lower than the door of the shed.
If you’re planning to build a shed and want a solid, long lasting base for it, this guide walks you through the entire process from start to finish, in plain simple language. No confusing jargon, just the real steps that actually work.
Let’s get started.
Why the Concrete Slab Matters So Much
A shed is only as good as what it’s sitting on. If your base isn’t strong, level, and properly built, your shed will shift over time, the door will stop closing properly, moisture will creep in from below, and you’ll end up dealing with rot or rust much sooner than expected.
A concrete slab gives you a flat, dry, strong surface that keeps your shed stable for decades if it’s done right. That’s why it’s worth taking your time with this step instead of rushing through it.
Tools and Materials You’ll Need
Before you start digging, gather everything you’ll need so you’re not running to the hardware store halfway through the job.
- Wooden boards for the frame (form boards)
- Stakes and a hammer
- A level and measuring tape
- A shovel and rake
- Gravel for the base layer
- Rebar or wire mesh for reinforcement
- Ready mix concrete or the materials to mix your own
- A wheelbarrow and mixing tools
- A screed board for leveling
- A bull float or trowel for finishing
- Work gloves and knee pads
Having everything ready before you begin saves you a huge amount of stress once the concrete starts setting.
Step 1: Plan the Size and Location
Start by deciding exactly where your shed will go and how big the slab needs to be. A good rule of thumb is to make the slab a few inches larger than the shed itself on each side. This gives you a small border around the shed, which helps with drainage and looks cleaner overall.
Pick a spot that’s already fairly flat, away from low areas where water tends to collect after rain. Avoid placing it too close to trees since roots can push up through the slab over time.
Step 2: Mark Out the Area
Once you’ve picked your spot, use stakes and string to mark the exact outline of your slab. Measure diagonally from corner to corner to check that your layout is a perfect rectangle. If both diagonal measurements match, your corners are square.
Taking a few extra minutes here saves you from ending up with a lopsided slab that doesn’t match your shed’s shape properly.
Step 3: Dig Out the Area
Remove the grass and topsoil within your marked area. You’ll generally want to dig down around 4 to 6 inches, depending on how thick you want your gravel base and concrete layer to be.
Keep the bottom of the dug area as flat and even as possible. Any low or high spots will cause problems later when you’re pouring concrete, since it needs a consistent depth to cure properly.
Step 4: Build the Wooden Form
Now it’s time to build the frame that will hold your concrete in place while it sets. Use wooden boards around the edges of your dug out area, securing them with stakes driven into the ground on the outside of the boards.
Use a level to check that the top edges of your form boards are perfectly even all the way around. This is one of the most important steps, because your concrete will follow the shape and height of this frame exactly. If the frame is uneven, your slab will be uneven too.
Step 5: Add a Gravel Base
Pour a layer of gravel into the bottom of your dug out area, usually around 4 inches deep. Spread it out evenly and compact it down using a hand tamper or a plate compactor if you have access to one.
This gravel layer helps with drainage underneath your slab and prevents water from pooling and causing cracks or shifting later on. Skipping this step is a common mistake that leads to slab problems within just a year or two.
Step 6: Add Reinforcement
Lay down rebar or wire mesh across the gravel base before pouring your concrete. This reinforcement gives the slab extra strength and helps prevent cracking as the concrete ages and shifts slightly with temperature changes.
Prop the mesh or rebar up slightly using small blocks or chairs so it sits in the middle of the concrete once poured, rather than resting directly on the gravel.
Step 7: Mix and Pour the Concrete
If you’re using ready mix bags, follow the instructions on the packaging carefully regarding water ratio. Too much water weakens the concrete, while too little makes it hard to work with. If you’re getting a concrete truck delivery for a larger shed, coordinate the timing so you’re ready to pour as soon as it arrives.
Pour the concrete into your form starting from one corner and working your way across. Use a shovel or rake to spread it evenly and fill in all corners and edges of the frame.
Step 8: Level the Surface
Once the concrete is poured, use a screed board, a straight piece of wood longer than your slab is wide, to level the surface. Rest it on top of the form boards and drag it across in a sawing motion to remove excess concrete and fill in low spots.
Work in small sections if your slab is large, so the concrete doesn’t start setting before you’ve had a chance to level it properly.
Step 9: Finish the Surface
After leveling, use a bull float to smooth out the surface further and push down any small stones that might be sticking up. Let the concrete sit for a bit until the surface water disappears, then use a trowel to create a smoother final finish if you want one.
If you’d like a slightly textured surface for better grip, a broom can be lightly dragged across the top after floating to create a light texture.
Step 10: Let It Cure Properly
This is the step most people rush, and it’s the one that matters most for long term strength. Concrete needs time to cure, not just dry. It generally takes around a week to reach enough strength to walk on comfortably, though full curing can take closer to a month.
Keep the slab moist during the first few days by lightly spraying it with water or covering it with plastic sheeting, especially if the weather is hot and dry. This slower curing process actually makes the concrete stronger in the long run.
Common Mistakes to Avoid
A few small mistakes cause most of the problems people run into with shed slabs. Watch out for these.
- Not leveling the form properly. Even a small tilt in your wooden frame can throw off the entire slab.
- Pouring on a rainy day or right before rain. Water disrupts the curing process and weakens the surface.
- Skipping the gravel base. This leads to water pooling under the slab and cracking over time.
- Rushing the curing time. Walking on the slab or placing your shed on it too soon can cause damage that shows up months later.
- Forgetting to check for underground utilities. Always check before digging to avoid hitting pipes or cables.
Final Thoughts
Pouring a concrete slab for your shed isn’t complicated once you break it down into steps, but it does require patience and attention to detail. Rushing through any single step, whether it’s leveling the frame, adding the gravel base, or letting the concrete cure, can cause problems that are much harder to fix later.
Take your time, follow each step carefully, and you’ll end up with a strong, flat, long lasting base that your shed can sit on for years without any issues.
Frequently Asked Questions
1. How thick should a concrete slab be for a shed?
For most standard sized sheds, a thickness of around 4 inches is enough. Larger sheds or ones storing heavy equipment may need a slightly thicker slab.
2. How long does concrete need to cure before I can put my shed on it?
It’s best to wait at least a week before placing weight on it, though waiting closer to a full month gives the concrete more time to reach full strength.
3. Can I pour a concrete slab myself without hiring anyone?
Yes, small to medium sized shed slabs are a manageable project for most people with basic tools and some patience, though larger slabs may benefit from an extra set of hands.
4. Do I really need a gravel base under the slab?
Yes. It helps with drainage and prevents cracking, so it’s not a step worth skipping even though it adds extra time to the project.