
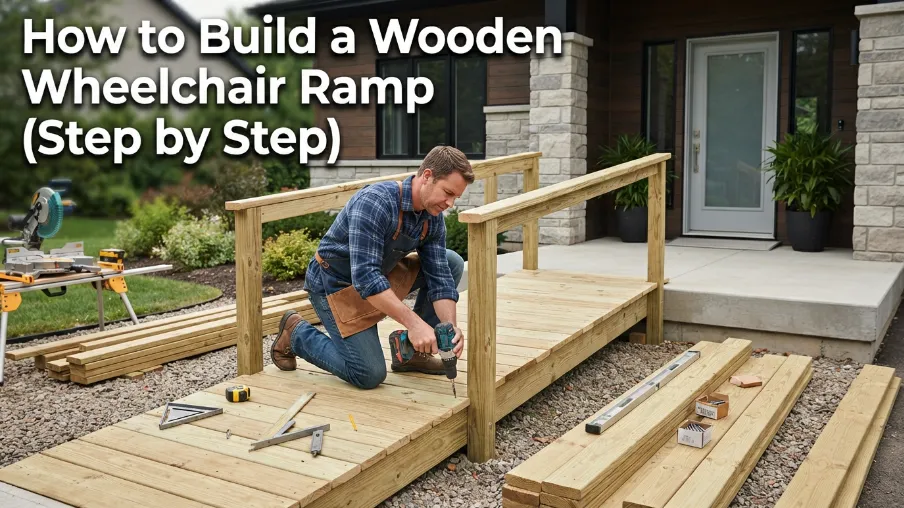
Building a wheelchair ramp isn’t just another home improvement project. For a lot of families, it’s the difference between someone being able to leave their house independently or being stuck waiting for help every single time they need to get in or out. That makes getting this project right, not just quick or cheap, incredibly important.
The good news is that a wooden wheelchair ramp is something most people can build themselves with the right planning and materials. This guide walks you through the entire process, step by step, so you end up with a ramp that’s not only functional but genuinely safe for daily use.
Let’s get into it.
Why Proper Planning Matters More Than Usual Here
With most backyard projects, a small mistake just means something looks slightly off. With a wheelchair ramp, a small mistake in slope or width can mean the ramp is actually dangerous or unusable for the person it’s meant to help. That’s why this project deserves a bit more careful planning than your average weekend build.
Before you start, think about who will be using the ramp, whether it’s a manual wheelchair, a power chair, or a walker, since this affects the width and slope requirements. Also think about the entry point, weather exposure, and how much space you actually have to work with.
Understanding the Right Slope Ratio
This is the single most important number in the entire project. The slope of your ramp determines how easy or difficult it is to use safely.
A commonly recommended ratio is 1 inch of rise for every 12 inches of ramp length, often written as a 1 to 12 ratio. This means if your entry point is 24 inches above ground level, your ramp needs to be at least 24 feet long to maintain a safe, gradual slope.
A steeper ramp might seem tempting if you’re short on space, but it makes the ramp much harder and more dangerous to use, especially for someone in a manual wheelchair trying to push themselves up without assistance. If space is genuinely limited, adding a switchback design with a landing platform in the middle is a better solution than making the slope too steep.
Tools and Materials You’ll Need
- Pressure treated lumber for the frame and decking
- Concrete for footings
- Post hole digger
- Level and measuring tape
- Circular saw
- Drill and screws
- Galvanized deck screws or bolts
- Non slip decking material or grip tape
- Handrail materials
- Safety gloves and eye protection
Step 1: Measure the Rise and Plan Your Length
Start by measuring the exact height difference between the ground and the entry point your ramp needs to reach, this is called the rise. Using the 1 to 12 slope ratio, calculate the minimum length your ramp needs to be based on this measurement.
Write these numbers down clearly before moving forward, since this calculation forms the foundation for every other measurement in the project.
Step 2: Decide on Width
A minimum width of 36 inches is generally recommended to comfortably fit most wheelchairs, though wider is often better if space allows, especially if you want room for someone to walk alongside the wheelchair user for support.
If the ramp will be used by a power wheelchair or a wider mobility device, check the specific width needed for that equipment before finalizing your plan.
Step 3: Mark Out the Layout
Once you know your length and width, mark out the footprint of your ramp using stakes and string. Take into account where the ramp will start and end, making sure the bottom lands on a flat, stable surface and the top aligns properly with the entry point.
If your design includes a landing platform or a turn, mark these sections out clearly as well so you have a full visual of the entire structure before building begins.
Step 4: Set the Support Posts
Dig holes for your support posts at even intervals along the length of the ramp, typically every 4 to 6 feet, though this can vary based on your specific design and local building code requirements. Set the posts in concrete, using a level to make sure each one is perfectly plumb.
Let the concrete cure fully before applying any weight or continuing construction, usually a day or two depending on the product used.
Step 5: Build the Frame
Once your posts are set, build the horizontal frame that will support the ramp’s decking. This typically involves attaching horizontal beams, called stringers, along the slope from the top of the ramp down to the bottom, securely bolted to your support posts.
Double check the slope angle as you build this frame, using a level and your earlier calculations to confirm everything lines up with the safe 1 to 12 ratio you planned for.
Step 6: Install the Decking
Attach your decking boards across the frame, running perpendicular to the direction of travel. Leave small, consistent gaps between boards for drainage, which helps prevent water from pooling on the ramp surface during rain.
Secure each board firmly with galvanized deck screws, checking regularly that the surface stays flat and even as you work your way along the ramp.
Step 7: Add a Non Slip Surface
This step is critical for safety. Wood can become dangerously slippery when wet, so adding a non slip surface treatment is not optional for a ramp meant for daily use. Options include textured non slip decking material, grip tape strips, or a non slip paint additive mixed into your finish coat.
Apply this treatment across the entire usable surface of the ramp, paying extra attention to any areas near turns or landings where extra traction matters most.
Step 8: Install Handrails
Handrails give users something stable to hold onto and are an important safety feature, especially for anyone using the ramp who has limited mobility even while using a wheelchair or walker. Install handrails on both sides of the ramp at a comfortable height, generally around 34 to 38 inches from the ramp surface.
Make sure your handrail posts are securely attached to the frame, not just the decking, since they need to support real weight if someone leans on them for balance.
Step 9: Add Edge Protection
A small raised edge, sometimes called a curb or edge guard, running along both sides of the ramp helps prevent wheelchair wheels from accidentally rolling off the side. This is a simple addition but makes a real difference in everyday safety, especially on windier or narrower ramps.
Step 10: Seal and Finish the Wood
Once construction is complete, apply a weatherproof sealant to protect the wood from moisture, sun damage, and general wear over time. This step also helps maintain the non slip texture you added earlier, so choose a sealant that won’t make the surface glossy or slick.
Reapply sealant every year or two depending on your climate and how much weather exposure the ramp gets, to keep it performing safely for years to come.
Common Mistakes to Avoid
- Making the slope too steep. This is the most dangerous mistake and directly affects how safely the ramp can be used.
- Skipping the non slip surface. A smooth wooden ramp becomes a serious hazard the moment it rains or gets covered in morning dew.
- Building the ramp too narrow. Always check the width needed for the specific mobility device that will be using it.
- Forgetting handrails. Even short ramps benefit from handrails, especially for anyone with limited grip strength or balance.
- Not checking local building codes. Some areas have specific requirements for accessibility ramps, so it’s worth checking before you start building.
Final Thoughts
Building a wooden wheelchair ramp is a project that genuinely improves someone’s daily independence and quality of life, which makes taking the time to do it properly so important. Getting the slope right, choosing a safe non slip surface, and adding sturdy handrails are the details that turn a basic ramp into one that’s actually safe and comfortable to use every single day.
If you’re ever unsure about any part of the calculations or structural requirements, it’s worth consulting a contractor familiar with accessibility builds, especially for longer or more complex ramp designs.
Frequently Asked Questions
1. What is the standard slope for a wheelchair ramp?
A 1 to 12 ratio is commonly recommended, meaning 1 inch of rise for every 12 inches of ramp length.
2. How wide should a wheelchair ramp be?
A minimum of 36 inches is generally recommended, though wider ramps offer more comfort and room for assistance if needed.
3. Do wheelchair ramps need handrails?
Yes, handrails are an important safety feature, especially for ramps used daily, giving users something stable to hold onto for balance and support.
4. Can I build a wheelchair ramp myself or do I need a professional?
Many people build their own ramps successfully by following proper slope and safety guidelines, though longer or more complex designs may benefit from professional input to make sure everything meets safety standards.