
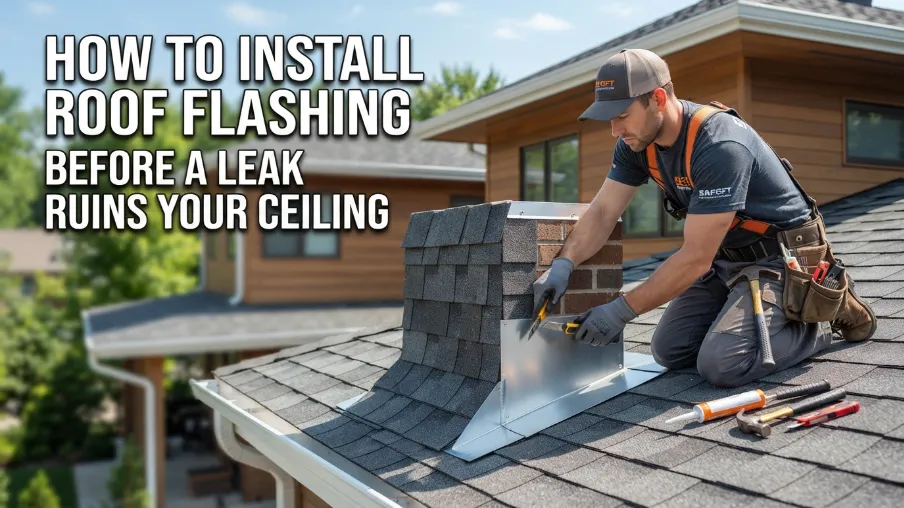
Roof flashing is one of those things nobody thinks about until water starts dripping through their ceiling. It’s a thin strip of material, usually metal, but it plays a massive role in keeping your roof watertight. A poorly installed piece of flashing, or worse, missing flashing altogether, is one of the most common reasons roofs leak, even when the shingles themselves look perfectly fine.
This guide walks you through exactly how flashing works, where it needs to go, and how to install it properly, step by step, in plain language. Whether you’re patching a small section or working on flashing during a full roof project, this will help you get it right.
Let’s get into it.
What Roof Flashing Actually Does
Flashing is installed at the joints and transitions on your roof, places where two different surfaces meet, like where your roof meets a chimney, a wall, a vent pipe, or a valley where two roof slopes come together. These spots are the weakest points on any roof because water naturally wants to collect and seep through these gaps.
The flashing acts as a barrier, directing water away from these vulnerable joints and down the roof slope instead of letting it pool and find its way underneath your shingles. Without proper flashing, even a well built roof will eventually develop leaks at these transition points.
Types of Roof Flashing You Should Know About
Different areas of your roof call for different flashing types, and knowing which one goes where makes a big difference in how well your roof performs long term.
- Step flashing is used along the sides of chimneys, dormers, and walls that meet your roof at an angle. It’s installed in individual pieces, layered with each row of shingles as you work up the roof.
- Continuous flashing comes in one long piece and is often used along roof to wall connections where a single strip can cover the entire length efficiently.
- Valley flashing goes in the valleys where two roof planes meet and channel a lot of water down toward the gutters. This area handles a heavy volume of water flow, so getting this flashing right matters a lot.
- Drip edge flashing runs along the edges of your roof, at the eaves and rakes, directing water away from the fascia and into the gutters rather than letting it drip down behind them.
- Vent pipe flashing wraps around any pipes or vents sticking up through your roof, sealing that awkward round opening against water intrusion.
- Chimney flashing is actually a combination of a few flashing pieces working together, including step flashing along the sides and a counter flashing piece embedded into the chimney itself.
Tools and Materials You’ll Need
- Flashing material, aluminum, galvanized steel, or copper depending on your preference
- Tin snips for cutting flashing
- Roofing nails or screws
- Roofing cement or sealant
- Caulking gun
- Pry bar for lifting shingles
- Hammer
- Chalk line for marking straight edges
- Safety harness and roof appropriate footwear
Step 1: Inspect the Area Before You Start
Before installing any new flashing, take a close look at the surrounding area. Check for rotted wood, damaged shingles, or existing water damage that needs to be addressed first. Installing new flashing over a compromised roof deck won’t solve your leak problem, it just hides it temporarily.
If you find soft or damaged wood underneath, that section needs to be repaired or replaced before you move forward with flashing installation.
Step 2: Remove Old or Damaged Flashing
If you’re replacing existing flashing, carefully pry up the surrounding shingles using a pry bar to expose the old flashing underneath. Remove any nails holding the old piece in place and pull it out gently to avoid damaging the shingles around it any further than necessary.
Clean off any old roofing cement or debris left behind so you’re working with a clear, flat surface for the new installation.
Step 3: Cut Your Flashing to Size
Measure the area you’re working on carefully and cut your flashing material to fit using tin snips. For step flashing, you’ll typically cut multiple smaller pieces, usually around 8 by 10 inches, that get bent at a 90 degree angle down the middle so half sits on the roof deck and half runs up the vertical surface, like a wall or chimney.
Take your time with these cuts since a poorly sized piece won’t create a proper seal, no matter how well you install everything else around it.
Step 4: Install Step Flashing Along Walls or Chimneys
Working from the bottom of the roof upward, place your first piece of step flashing so it overlaps the top of a shingle course. Nail it into place on the roof deck side only, never through the vertical wall side, since this needs to stay flexible enough to move slightly with temperature changes without cracking your seal.
Continue laying your next row of shingles over the bottom portion of that flashing piece, then place your next piece of step flashing so it overlaps the previous one by a couple inches. Repeat this layering pattern all the way up the slope, alternating between a row of shingles and a piece of step flashing.
Step 5: Install Continuous Flashing Where Needed
For long roof to wall connections where continuous flashing makes more sense than individual step pieces, position the flashing so it extends up the wall and out over the roof deck. Secure it with roofing nails along the top edge, spaced evenly to hold it firmly without warping the material.
Apply a bead of roofing cement or sealant along the top edge where the flashing meets the wall to reinforce the seal against water intrusion.
Step 6: Handle Valley Flashing Carefully
Valleys deal with a lot of water runoff, so this flashing needs to be installed with extra attention to detail. Lay your valley flashing down the center of the valley, making sure it extends far enough up each side to fully cover the joint.
Nail it along the outer edges only, keeping the center area free of nail holes since this is where the heaviest water flow will travel. Shingles are then trimmed and laid over the edges of the valley flashing, leaving a clear channel down the middle for water to flow freely toward the gutters.
Step 7: Install Vent Pipe Flashing
For pipes sticking up through your roof, slide the flashing’s rubber or metal collar down over the pipe until it sits flush against the roof deck. Nail the flat base of the flashing down securely, then apply roofing cement around the edges and the base of the pipe collar itself for extra protection against leaks.
Layer your surrounding shingles so the top portion of the flashing base is covered while the bottom portion sits over the top of the shingle course below it, following the same water shedding principle used throughout the rest of your roof.
Step 8: Finish With Counter Flashing on Chimneys
If you’re working around a chimney, after your step flashing is installed along the sides, you’ll need counter flashing embedded into the mortar joints of the chimney itself. This piece overlaps the step flashing from above, creating a two layer defense against water getting behind the flashing and into your roof structure.
Cut a small groove into the mortar joint, insert the counter flashing, and seal it in place with mortar or a high quality sealant made for this purpose.
Step 9: Seal All Edges and Overlaps
Once your flashing pieces are all installed and layered correctly with your shingles, go back over every edge, overlap, and joint with roofing cement or a compatible sealant. This extra layer of protection helps fill in any tiny gaps that might let water sneak through over time.
Don’t skip this step even if everything looks properly installed, since this final seal adds a meaningful layer of protection against leaks developing down the road.
Common Mistakes to Avoid
- Nailing through the vertical side of step flashing. This restricts natural movement and can crack your seal over time.
- Using the wrong flashing material for your climate or roof type. Certain metals react poorly with certain roofing materials, so check compatibility first.
- Skipping roofing cement at overlaps and joints. These small gaps are exactly where leaks start.
- Reusing old, bent, or corroded flashing. Flashing that’s been damaged or corroded won’t create a proper seal, even if it looks fine at a glance.
- Not overlapping flashing pieces enough. Insufficient overlap leaves gaps where water can work its way underneath.
Final Thoughts
Roof flashing might seem like a small detail compared to the shingles covering most of your roof, but it’s honestly one of the most important parts of keeping your house dry. Taking the time to install it properly, layering it correctly with your shingles, and sealing every joint carefully, saves you from dealing with hidden leaks and water damage that can be far more expensive to fix later.
If you’re not confident tackling flashing work yourself, especially around complex areas like chimneys, it’s worth bringing in a roofing professional. But for straightforward sections, following these steps carefully will give you a solid, watertight result.
Frequently Asked Questions
1. How long does roof flashing typically last?
Depending on the material, flashing can last anywhere from 20 to 50 years. Aluminum and galvanized steel tend to last a couple decades, while copper flashing can last much longer with proper installation.
2. Can I install roof flashing myself without a professional?
Simple sections like vent pipe flashing or straightforward continuous flashing can often be handled by a confident do it yourself homeowner. More complex areas like chimney counter flashing are usually best left to a professional due to the precision required.
3. What is the best material for roof flashing?
Aluminum is affordable and widely used, galvanized steel offers good durability at a reasonable price, and copper is the most long lasting option though it comes at a higher cost.
4. How do I know if my roof flashing is failing?
Signs include water stains on your ceiling near chimneys or walls, visible rust or corrosion on the flashing itself, or gaps and separation where the flashing meets the roof surface.