
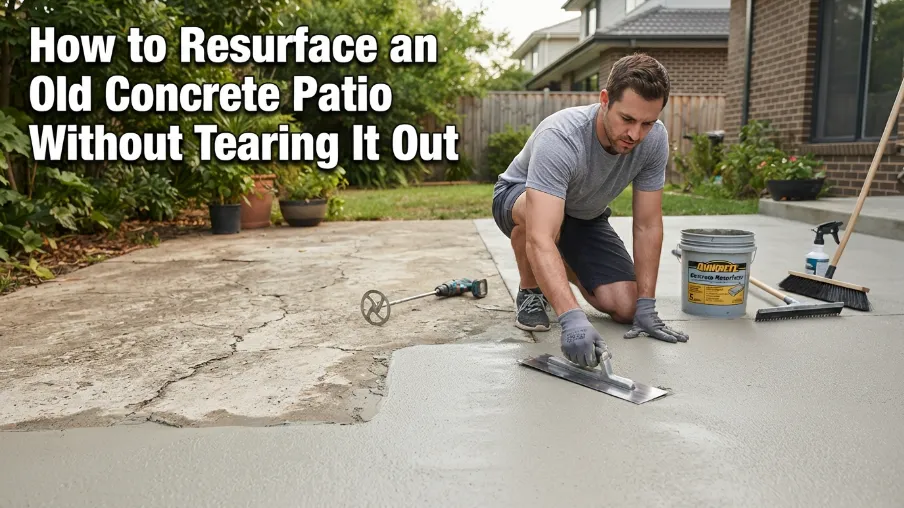
If your patio is covered in cracks, stains, and that dull faded look concrete gets after years of sun and rain, your first thought is probably that you need to rip it all out and start fresh. That’s expensive, messy, and honestly, most of the time it’s not even necessary.
Resurfacing lets you take that old, tired concrete and give it a whole new top layer that looks fresh and smooth, without the cost or hassle of demolition. This guide walks you through exactly how to do it, step by step, in plain language anyone can follow.
Let’s get into it.
What Does Resurfacing Actually Mean
Resurfacing means applying a new thin layer of concrete mix or a specialized resurfacer product on top of your existing slab. It bonds to the old concrete and creates a fresh, smooth surface that hides cracks, stains, and rough patches underneath.
It’s not the same as repairing deep structural damage. If your patio has major heaving, large gaps, or is sinking in certain spots, resurfacing won’t fix that. But for surface level wear and tear, which is what most old patios deal with, it works really well.
How Do You Know If Your Patio Is a Good Candidate
Before you buy any materials, take a walk around your patio and check a few things.
Look for hairline cracks and surface stains rather than deep structural cracks. Small cracks under a quarter inch wide are usually fine for resurfacing. Check that the slab isn’t sinking, shifting, or badly uneven in any area. Press down on a few random spots with your foot, if the concrete feels solid and doesn’t flex or crumble, you’re likely good to go.
If your patio has major structural issues, it’s worth getting a professional opinion before spending money and time on resurfacing.
Tools and Materials You’ll Need
Gathering everything ahead of time makes the whole project go smoother.
- Pressure washer
- Wire brush or scraper
- Concrete patching compound for cracks
- Concrete resurfacer mix
- Mixing bucket or drill with paddle mixer
- Squeegee or trowel
- Broom for texture
- Concrete sealer
- Painter’s tape for edges
- Safety gloves and knee pads
Step 1: Clean the Surface Thoroughly
This step matters more than people realize. Any dirt, grease, mold, or loose debris left on the surface will stop the new layer from bonding properly, which leads to peeling and cracking later.
Start with a pressure washer and go over the entire patio surface, paying extra attention to stained areas and corners where dirt tends to build up. If there are oil stains or grease spots, use a degreaser before pressure washing. Let the surface dry completely before moving to the next step, this usually takes a full day depending on weather.
Step 2: Repair Cracks and Holes
Once your patio is clean and dry, go around and fill in any cracks or small holes using a concrete patching compound. Apply it with a putty knife or trowel, pressing it firmly into the crack so there’s no air gap underneath.
Smooth the patch level with the surrounding surface and let it cure according to the product instructions, usually 24 hours or so. Skipping this step means those same cracks can show through your new resurfaced layer over time.
Step 3: Tape Off the Edges
Use painter’s tape along any edges where your patio meets a wall, step, or garden bed. This keeps your resurfacing material neat and gives you clean, defined lines once you’re finished.
It’s a small step but it saves a lot of cleanup and touch up work later.
Step 4: Mix the Resurfacer
Follow the instructions on your resurfacer product carefully, since the water to powder ratio really affects how well it spreads and bonds. Most products recommend mixing small batches at a time so you can work with the mixture before it starts to set.
Use a drill with a paddle attachment for the smoothest, most consistent mix. Lumpy or uneven mixing leads to an uneven finish once applied.
Step 5: Apply the First Coat
Pour the mixed resurfacer onto the patio in sections and spread it out using a squeegee or trowel, working in smooth, even strokes. Keep a wet edge as you move across the patio so the coat blends together without visible seams.
Work fairly quickly since resurfacer mixes tend to set faster than regular concrete. It’s better to work in smaller sections than to rush across the whole patio and end up with uneven texture.
Step 6: Add Texture If You Want It
If you like a slightly textured, non slippery surface, drag a broom lightly across the wet resurfacer after applying it. This is completely optional, some people prefer a smoother, more polished look instead.
Either way, this step needs to happen while the material is still workable, so don’t wait too long after applying it.
Step 7: Let the First Coat Cure
Give the first coat time to cure before deciding if you need a second layer. Most resurfacer products need at least a few hours to firm up, though full curing can take a day or two depending on the weather and product.
Avoid walking on it or placing furniture on it during this time.
Step 8: Apply a Second Coat If Needed
For patios with deeper wear or uneven older surfaces, a second thin coat often gives a better, more even finish. Apply it the same way as the first coat, keeping your strokes smooth and consistent.
Not every patio needs two coats, but if you’re noticing patchy spots or the old surface still shows through in places, a second coat solves that.
Step 9: Seal the Surface
Once your resurfaced patio has fully cured, usually after a few days, apply a concrete sealer over the top. This protects the new surface from staining, water damage, and general wear, and it extends the life of your resurfacing work by years.
Apply the sealer with a roller or sprayer in thin, even coats, following the product’s drying time recommendations between coats if you’re applying more than one.
Common Mistakes to Avoid
- Skipping the cleaning step. Dust and grime left behind cause the new layer to peel within months.
- Applying resurfacer in extreme heat or direct sunlight. It sets too fast and can crack.
- Mixing large batches at once. The material sets before you can spread it properly, leading to lumps and uneven texture.
- Walking on it too soon. Even if it looks dry on top, it needs the full curing time to reach proper strength.
- Ignoring drainage slopes. If your original patio had a slight slope for water runoff, keep that same slope when applying the new layer.
Final Thoughts
Resurfacing an old concrete patio is one of those projects that gives you a big visual upgrade without a huge amount of cost or labor compared to tearing everything out and starting over. The key is taking your time with the prep work, since a clean, properly repaired surface makes all the difference in how well the new layer holds up over the years.
If your patio has cracks and stains but is otherwise structurally sound, this is a project you can realistically tackle over a weekend and enjoy a fresh looking outdoor space for a fraction of the cost of full replacement.
Frequently Asked Questions
1. How long does resurfaced concrete last?
With proper prep and a good sealer, a resurfaced patio can last anywhere from 10 to 15 years before it needs attention again.
2. Can I resurface concrete myself or do I need a professional? Most homeowners can handle a standard sized patio themselves as long as they follow the steps carefully. Larger areas or patios with structural issues may need a professional.
3. What is the best weather for resurfacing concrete? Mild, dry weather works best. Avoid extreme heat, direct sunlight, or rain within 24 hours of application since these affect how the resurfacer sets.
4. Do I need to seal a resurfaced patio? Yes. Sealing protects the new surface from stains and moisture and adds years to the life of your resurfacing work.